EuroPi - Trigger to Gate
Trigger to Gate Script for EuroPi
This script allows you to convert trigger into a gate signal.
This is a common requirement in Eurorack modular synthesizers, where some modules require a gate signal to trigger an event, rather than a trigger signal.

See this explanation on the difference between gates and triggers.
I originally wrote this script because my 2hp MIDI module clock was outputting 6ms triggers, which are too short to inter-operate with most of my Eurorack modules, which require longer gates e.g. 200ms.
Using my disting module’s H6 Dual Delayed Pulse Generator or buying a Doepfer A-162-2 Dual Trigger Delay module just for this seemed overkill, so I wrote a script for my existing EuroPi module, which at the time, was not bundled with a trigger to gate script.
The
trigger_to_gate.pyscript in this article is different to thegates_and_triggers.pyscript bundled with current (2024) versions of the EuroPi. The differences in features are explained below.
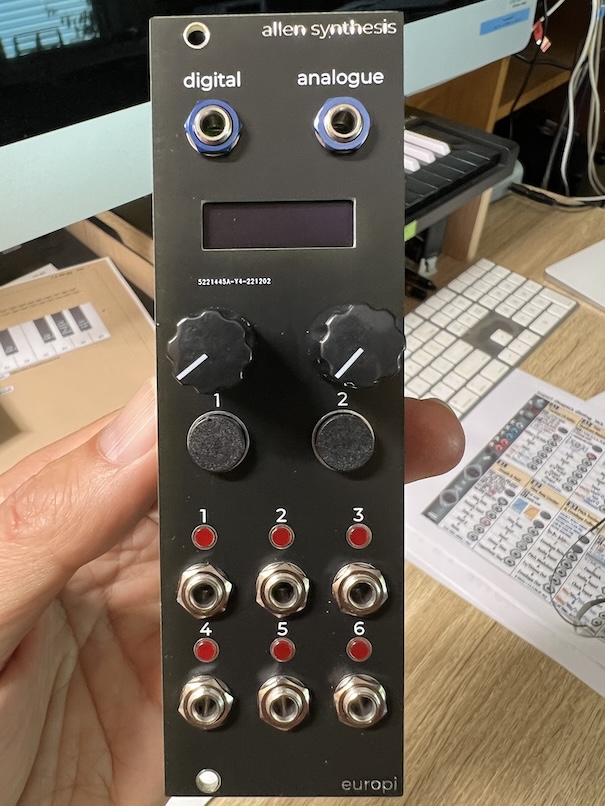
What is a EuroPi?
The EuroPi is a Eurorack module that allows you to control your modular synthesizer with a Raspberry Pi. You build it yourself using the information at https://github.com/Allen-Synthesis/EuroPi
Trigger to Gate
Generates a gate on cv1 in response to a trigger on din.
Control the outgoing pulse width with knob k1. Control the delay between the trigger and the gate starting with knob k2. Handy for converting short triggers (e.g. 1ms) into longer gates (e.g. 10ms) as some Eurorack modules don’t like short triggers.
Also generates an independent (unrelated to din or gate output), internally driven clock output on cv2. Handy for when you need a simple clock with variable gate length.
For a shorter, smaller script, see my stripped down Trigger Gate Delay script below, without the clock mode functionality.
Installation
Since the EuroPi software/contrib does not have this
script already bundled (see pull request), you will need to manually install it by copying it
onto the EuroPi using Thonny IDE.
-
Copy the file trigger_to_gate.py to
/lib/contrib/trigger_to_gate.pyon your EuroPi. -
Edit
main.pyin the EuroPi/directory to include the Trigger to Gate script in the menu:
["TriggerToGate", "contrib.trigger_to_gate.TriggerToGate"], # <-- add this line
Documentation:
Trigger to Gate
- author: Andy Bulka (tcab) (github.com/abulka)
- date: 2023-05-16
- labels: trigger, gate, clock
Trigger to Gate mode: Generates a gate on cv1 in response to a trigger on din. Control the outgoing pulse width with k1. Control the delay between the trigger and the gate starting with k2. Handy for converting short triggers (e.g. 1ms) into longer gates (e.g. 10ms) as some eurorack modules don’t like short triggers.
din = trigger input
cv1 = gate output
b1 = toggle gate output on/off
k1 = length of gate (1-1500ms)
k2 = delay of gate (0-1500ms)
Clock mode: Generates an independent (unrelated to din or gate output), internally driven clock output on cv2. Handy for when you need a simple clock with variable gate length.
cv2 = clock output
b1 = toggle clock output on/off
k1 = length of clock pulse (1-1500ms)
k2 = period of clock (1-1500ms) - how fast the clock pulses
Usage
You can have both the gate and clock outputs running at the same time. There are two configuration screens, gate and clock. The screen mode is toggled by pressing b2.
b2 = toggle between gate/clock screen
This is what the screens look like:
                       Trigger to Gate Screen
         ┌─────────────────────────────────────────────┐
         │ Incoming din pulse length    din period   . │ ◀────── . symbol means that
         │                                             │         that gate output is on
(knob 1) │ Length of Gate                              │
         │                                             │         (b1 toggles)
(knob 2) │ Gate Delay                                  │
         └─────────────────────────────────────────────┘

                           Clock Screen
         ┌─────────────────────────────────────────────┐
         │ Clock bpm                                 . │ ◀────── . symbol means that
         │                                             │         that clock output is on
(knob 1) │ Clock pulse length                          │
         │                                             │         (b1 toggles)
(knob 2) │ Clock period (speed)                        │
         └─────────────────────────────────────────────┘
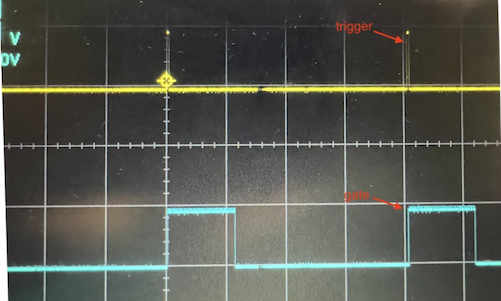
Example
- Incoming trigger is blue (DIN)
- Outgoing gate is purple (CV1).
- The internally driven clock outgoing gate (CV2) is not wired in this example.
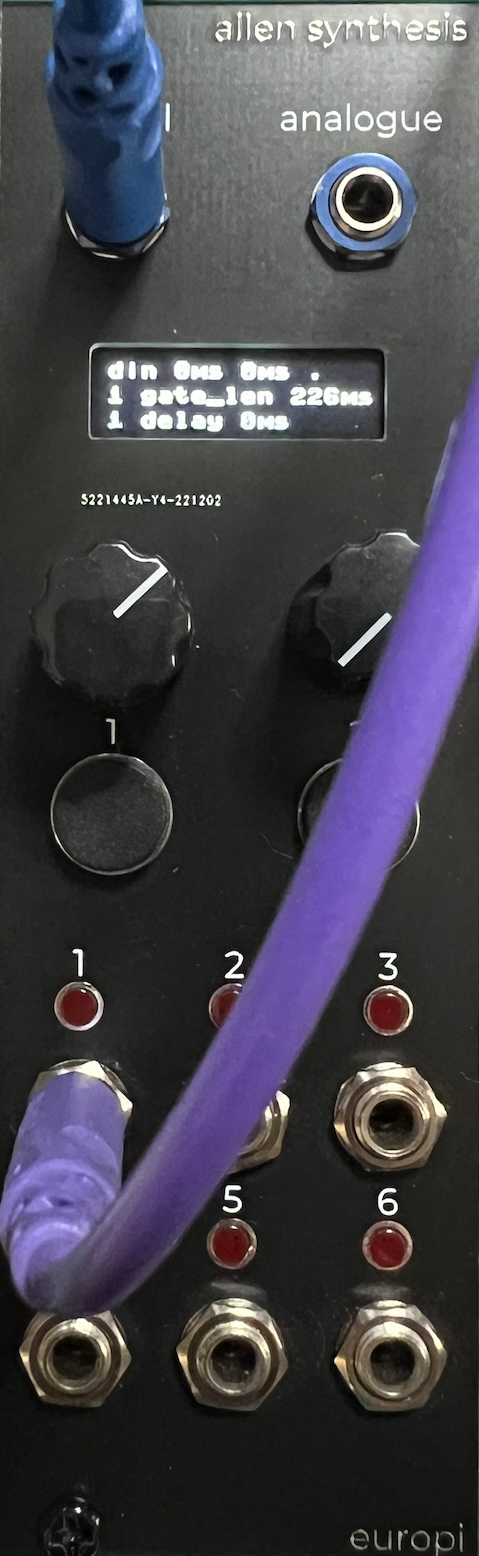
-
In this screenshot we see the outgoing gate is
226ms- you can change this by turning knob 1. -
The delay is
0msmeaning there is no delay between the incoming trigger and the outgoing gate. You can change the delay ms by turning knob 2.
Result:
Why not use the bundled gates_and_triggers.py script?
The 2024 and later EuroPi installation is now already bundled with a gates_and_triggers.py script which also generates a gate from a trigger but
- does not have a delay feature like many hardware modules implementing ’trigger to gate’ functionality have e.g. disting H6 algorithm and the Doepfer A-162-2 Dual Trigger Delay module.
- does not have a clock mode
- no knob pass through behaviour
- less choices on output gate lengths
My trigger_to_gate.py script also handles all possible edge cases like turning up the delay to more than gate length, or turning up the gate size past the trigger period etc. It also lets you choose from a larger variety of output gate lengths, using an easy to use exponential turn of the knob.
The knob passthrough feature is useful for when you want to toggle between gate and clock modes, and not have the knob jump to the previous value when you switch modes.
The knob passthrough feature is also useful when you turn on your hardware module and you want the knob value to be in the same position as when you turned it off, and the knob has physically moved slightly, so your sound is different.
The bundled gates_and_triggers.py script on the other hand:
- has has more cv outputs for rising and falling edges etc. if you need that
- is shorter, so if you don’t need the extra features of my script (like gate delay, knob pass though), you might prefer the bundled script.
See also: my stripped down, alternative Trigger Gate Delay script below, which is a simpler version of this script without the clock mode functionality.
See also: Documentation on my Scheduler, Hysteresis Mitigation and Knob Pass Through utility classes, which you can use in your own EuroPi scripts.
Trigger Gate Delay
This script is a simpler, shorter version of the above script, without the clock mode functionality, which makes the script more understandable (if you are interested in reading the code) and shorter in length (if you are worried about disk space on your EuroPi). It offers the ’trigger to gate’ functionality, with optional gate delay.
I’ve named it ‘Trigger Gate Delay’ (instead of ‘Trigger to Gate’) to differentiate it from the more complex script above.
Installation
- Copy the file trigger_gate_delay.py to
/lib/contrib/trigger_gate_delay.pyon your EuroPi. - Edit
main.pyin the EuroPi/directory to include the script in the menu:
["TriggerGateDelay", "contrib.trigger_gate_delay.TriggerGateDelay"], # <-- add this line
Documentation
Documentation is exactly the same as the Trigger to Gate script above, except that the clock mode is not present.
Script Variants
The recommended script in the installation instructions offers the full trigger to gate functionality, with hysteresis mitigation but no knob pass-through feature. This is a good compromise between script length and functionality, as pass-through mitigation is not as important as hysteresis mitigation - especially since we aren’t switching modes with this simplified ‘Trigger Gate Delay’ script, where a knob likely has a different value when you change mode.
Here are all the variants of the script, so you can choose the one that best suits your needs:
| Script | Description | Lines |
|---|---|---|
| trigger_gate_delay.py | recommended - hysteresis mitigation only | 313 |
| trigger_gate_delay.py - full | full - hysteresis mitigation + knob pass-through feature | 370 |
| trigger_gate_delay.py - tiny | tiny - no hysteresis mitigation or pass-through | 263 |
Summary
- Trigger to Gate script, with gate delay feature and internal clock mode.
- Trigger Gate Delay script, without the clock mode functionality.
- Documentation on my Scheduler, Hysteresis Mitigation and Knob Pass Through utility classes, which you can use in your own EuroPi scripts.
Feedback
Was this page helpful?
Glad to hear it! Please tell us how we can improve.
Sorry to hear that. Please tell us how we can improve.